

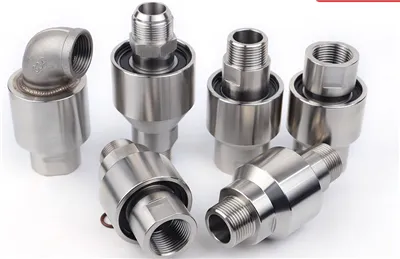
High Frequency Rotary Joint
Installing high-frequency swivel joints is a task that requires delicate handling and rigorous steps to ensure stable operation under complex conditions and efficient, leak-free fluid transfer.
High Frequency Rotary Joint
Installing high-frequency swivel joints is a task that requires delicate handling and rigorous steps to ensure stable operation under complex conditions and efficient, leak-free fluid transfer. The following is the detailed installation process:
1. Preparation
1. Check connectors and accessories
Carefully check whether the high-frequency rotary joint and its supporting flanges, gaskets, fasteners, etc. are intact, and whether the model specifications are consistent with the design requirements. Make sure that there are no foreign bodies inside the joint, and no scratches, bumps and other defects on the sealing surface.
2. Clean the connection parts
Thoroughly clean the installation interface and the connection end face of the rotary joint on the equipment to remove oil, rust, burr and other debris, and ensure that the contact surface is smooth and smooth to ensure the sealing effect.
3. Apply grease
Apply appropriate amount of special grease to the rotating bearing part of the joint to reduce friction and extend service life. Be careful not to contaminate the sealing surface with grease.
Second, the installation process
1. Connect the flange
Align the high frequency rotary joint with the corresponding flange on the equipment to ensure that the center axis is consistent and there is no deviation. Use temporary positioning devices (such as dowel pins) for pre-fixing to prevent position deviation during installation.
2. Install gaskets
Place spacers correctly between the two butt flanges. The gasket should be consistent with the aperture of the flange, without deformation or damage, and ensure that it is placed in the flange slot, without dislocation or warping.
3. Secure the connection
Tighten the connection bolts gradually and evenly in a diagonal sequence, following the torque value provided by the manufacturer. Avoid one-time tightening caused by stress concentration, affect the sealing effect and joint life. Ensure that all bolts are stressed evenly, without loosening or slipping.
3. Commissioning and acceptance
1. Initial operation
After the installation is completed, manually rotate the joint to check whether the rotation is smooth, whether there is stuck, abnormal sound and so on. Then the low-speed no-load test run was carried out to observe the working state of the joint, including temperature, vibration, leakage and other indicators.
2. Stress test
After the no-load operation is normal, the pressure test is carried out according to the design pressure. Slowly pressurize to the working pressure, and check whether there is leakage in each sealing part after stabilizing the pressure for a period of time. At the same time, monitor whether the operation sound, vibration and other parameters of the joint are normal.
3. Full load operation
After passing the above test, the load is gradually increased to full load operation, and the performance indicators of the joint are confirmed again to ensure that it works stably, efficiently and without leakage under actual working conditions.
To sum up, the installation of high-frequency rotary joints is a systematic and meticulous process, and each link needs to be strictly controlled to ensure the reliable operation of the joints and the overall efficiency of the equipment, laying a solid foundation for achieving energy conservation and emission reduction goals.
Hot Tags: high frequency rotary joint, China high frequency rotary joint manufacturers, factory, durable rotary union, rotary union for polishing systems, rotary union for aerospace machines, rotary union for welding machines, rotary connector, rotary union for telecommunications systems


Send Inquiry